Staub, Schmutz, Und Flecken auf Ihrem Sensor können zu unerwünschten Stellen und Flecken auf Ihren Fotos führen, Besonders beim Schießen auf schmale Öffnungen. Wenn Sie dunkle Flecken in Ihren Bildern bemerkt haben, Es könnte Zeit sein, Ihren Kamerasensor zu reinigen. In diesem Ratgeber, we’ll walk you through the steps to safely and effectively clean your camera sensor, ensuring your photos remain crisp and spot-free.
Why Is Camera Sensor Cleaning Important?
Your camera’s sensor is the heart of your photography equipment. Im Laufe der Zeit, dust and debris can accumulate on the sensor, particularly when changing lenses. This can result in visible spots in your images, especially in areas with uniform colors like skies or white backgrounds. Regular sensor cleaning not only improves image quality but also extends the life of your camera.
Tools You’ll Need for Camera Sensor Cleaning
Before diving into the cleaning process, Sammeln Sie die folgenden Werkzeuge:
- Sensorreinigungsabstriche: Designed specifically for camera sensors, these swabs are lint-free and come in various sizes to match your sensor.
- Sensor Cleaning Solution: A specialized cleaning fluid that evaporates quickly without leaving residue.
- Rocket Blower: A handheld blower to remove loose dust particles.
- Magnifying Loupe or Sensor Scope: Helps you inspect the sensor for dust and debris.
- Microfiber Cloth: For cleaning the camera body and surrounding areas.
- Handschuhe: To prevent fingerprints and oil from transferring to the sensor.
Step-by-Step Guide to Cleaning Your Camera Sensor
Schritt 1: Prepare Your Workspace
Choose a clean, dust-free environment to minimize the risk of introducing new debris. A well-lit area or a desk with a clean surface is ideal. Turn off your camera to avoid static electricity, which can attract dust.
Schritt 2: Inspect the Sensor
Set your camera to manual cleaning mode (check your camera’s manual for instructions). This locks the mirror up and exposes the sensor. Use a magnifying loupe or sensor scope to inspect the sensor for dust, spots, oder Flecken.
Schritt 3: Remove Loose Dust with a Rocket Blower
Hold your camera facing downward and use a rocket blower to gently remove loose dust particles. Avoid touching the sensor with the blower, and never use compressed air, as it can damage the sensor.
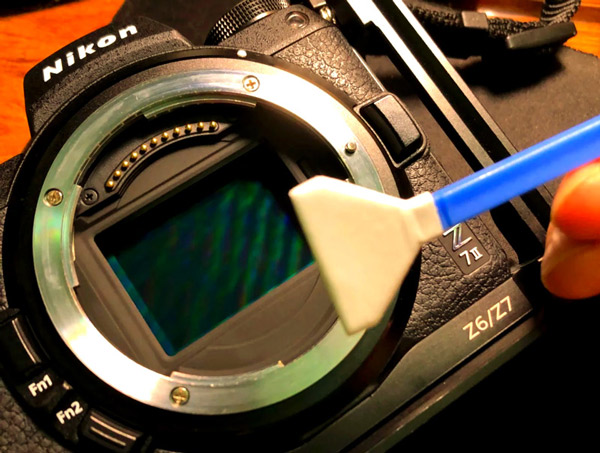
Schritt 4: Use Sensor Cleaning Swabs
If dust persists, it’s time to use a sensor cleaning swab. Apply a few drops of sensor cleaning solution to the swab (do not oversaturate). Gently swipe the swab across the sensor in one direction, then flip it and swipe in the opposite direction. Avoid pressing too hard or going over the same area multiple times.
Schritt 5: Inspect Again
Nach der Reinigung, inspect the sensor again using your magnifying loupe or sensor scope. If spots remain, repeat the process with a fresh swab.
Schritt 6: Wieder zusammenbauen und testen
Exit manual cleaning mode and reattach your lens. Take a test shot of a plain, evenly lit surface (like a white wall or sky) at a narrow aperture (f/16 or higher). Review the image for any remaining spots.
Tips for Maintaining a Clean Sensor
- Prevent Dust: Always turn off your camera before changing lenses, and do so in a clean environment.
- Use Lens Caps: Keep your lenses and camera body capped when not in use.
- Regular Inspections: Check your sensor periodically, especially after shooting in dusty or windy conditions.
- Professional Cleaning: If you’re uncomfortable cleaning the sensor yourself, consider taking your camera to a professional.