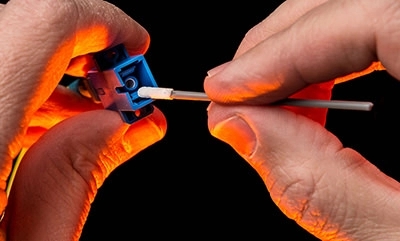
Fiber optic connectors are essential components in telecommunication networks, ensuring data is transmitted with minimal loss. でも, they can become dirty over time, affecting performance. Cleaning fiber optic connectors properly is crucial to maintaining optimal network performance.

Understand the Importance of Connector Cleanliness
Fiber optic connectors are designed to transmit light signals with minimal loss, but even the smallest amount of dirt, ほこり, or debris can significantly impact the signal quality. Improper cleaning can lead to increased signal attenuation, reflections, and even permanent damage to the connector and the connected equipment.
必要なツール
あなたが始める前に, gather the necessary tools:
- 糸くずの出ないワイプ
- イソプロピルアルコール (at least 90%)
- Compressed air (optional)
- Fiber optic cleaning swabs
- Inspection microscope
Step-by-Step Guide to Cleaning Fiber Optic Connectors
1. Power Down Your Equipment
Always power down your equipment before cleaning to avoid any potential damage or safety hazards.
2. Inspect the Connector
Use an inspection microscope to check the condition of the fiber optic connector. This will help you determine the extent of cleaning required.
3. Dry Cleaning with Swabs
Use a dry fiber optic cleaning swab to gently clean the connector end-face. Insert the swab into the adapter and rotate it a few times to remove any loose debris.
4. Wet Cleaning with Alcohol
For more stubborn contaminants, use a lint-free wipe lightly moistened with isopropyl alcohol. Wipe the connector end-face in one direction to avoid redistributing the dirt. Follow up with a dry wipe to remove any alcohol residue.
5. Use Compressed Air
(オプション) Use a can of compressed air to blow away any remaining dust particles. Ensure the air is dry and clean to prevent introducing new contaminants.
6. Final Inspection
清掃後, inspect the connector again with the microscope to ensure all contaminants have been removed. 必要であれば, repeat the cleaning process.
 クリーンルーム用フォームスワブ, ポリエステル綿棒, プリンタークリーニングキットメーカー – MediTech